Pages

Showing posts with label garden loopers. Show all posts

Saturday, 26 March 2016

Trumpets of Angels and Herbs of Love

PLANT DOCTOR

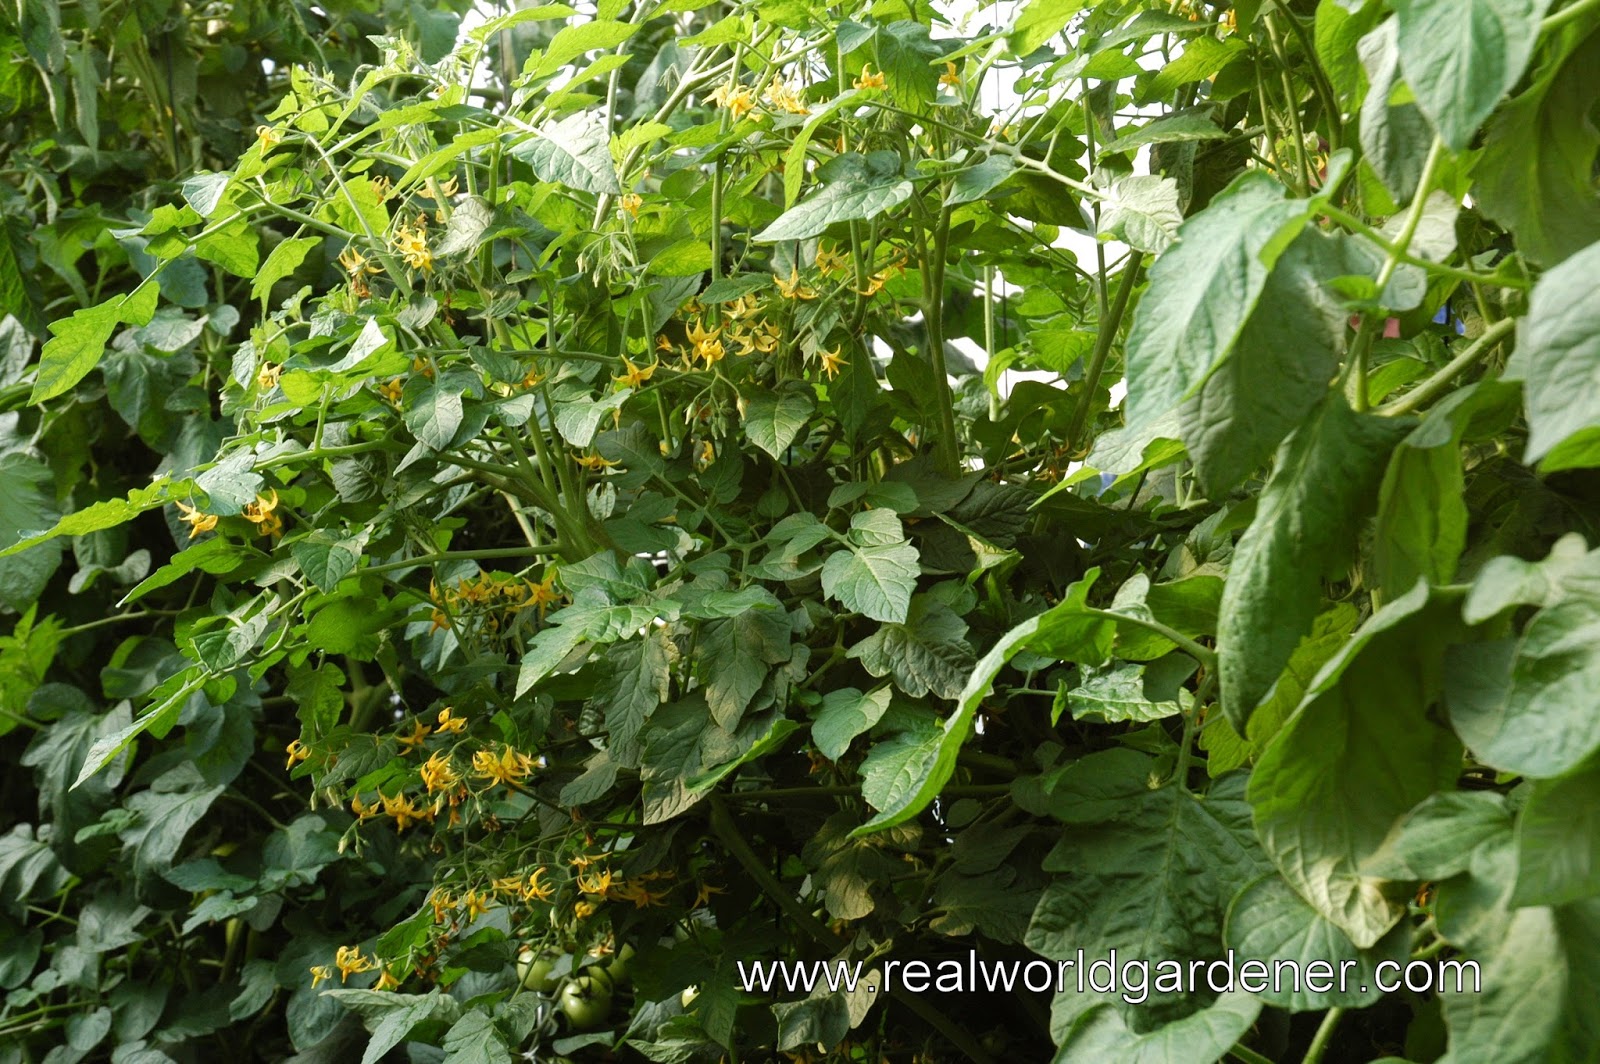
Tomatoes are almost the number one plant to grow in the vegetable garden.
Shall we say, botanically a fruit, but we call it a vegetable?
Home grown tomatoes. photo M. Cannon
Last week Plant Doctor looked at the pests that are attracted to your tomatoes, but today we’re looking at the diseases that your tomatoes can succumb to.
Not that you can’t grow healthy plants but in case you’ve had problems and are on the point of giving up, here’s how to deal with some of these diseases.
I'm talking with Steve Falcioni, General Manager of www.ecoorganicgarden.com.au

Some of the disease problems we talked about are the wilts:-Verticillium wilt which prefers cooler conditions and has a dark brown centre if you cut the stem; Fusarium wilt which occurs more in warmer conditions and has a pinky brown centre when you cut through the stem.
Basically you have to pull out and destroy the plants and not put them into the compost because they will the disease will spread.
Then there's the spotty problems like Septoria or Target Spot which are a combination of fungal and bacterial disease. This can cause spotting on both the leaves and the fruit.
You might be starting to think that there’s too many pests and diseases that go for your tomatoes, but don’t let that stop you from growing them, because they are enjoyable to grow.
Prevention where possible is always best and fortnightly sprays of seaweed solution strengthens the cell walls of the plant. 
Blossom end rot is not a disease but a calcium deficiency. Sometimes caused by lack of sufficient water or irregular watering during dry times.
Adding a sprinkle of Dolomite around the plant when first putting them in will help solve this problem.
Blossom end rot. photo M Cannon

Another tip is to not have the plants flopping around but staked up and remove the lower leaves.
The biggest tip is to rotate where you grow your tomato plants rather than planting them in the same spot year after year.
If you’ve only got one dedicated spot for your veggie bed, then you may have to rethink where you put these tomatoes, say in the front garden amongst your perennial flowers.
If you have any questions about pests of tomatoes or have some information to share, drop us a line to realworldgardener@gmail.com or write in to 2RRR PO Box 644 Gladesville NSW 1675

VEGETABLE HEROES

Well it’s TIME FOR VEGETABLE HERO a herb today, and it’s Savory, The Herb of Love.
Winter savory (Satureja montana) is a perennial herb in the mint family (Lamiaceae,) and it’s native to warm temperate regions of southern Europe.
How many times have you heard the phrase "a savory stew?"
Savory is used in herb combinations, such as Herbes de Provence, a French combination of herbs used for seasoning.
Savory is an annual or perennial herb, Satureja hortenis, for Summer Savory, or Saturejo montana being for Winter Savory.
Winter savory is now little used

Winter Savory

in Australia, but for hundreds of years both winter and summer savory have been grown and used, virtually side by side.
Both have strong spicy flavour.
What do they look like?
They have dark-green, narrow leaves for winter savory and light green narrow leaves for summer savory.
The savories can be used fresh or dried and crushed.
The history of savory goes back about 2000 years and it’s one of the oldest culinary herbs.
Here’s a surprising fact, the genus or first part of the latin name Satureja is derived from the word satyr, the half-man, half-goat creature in mythology who owned the savories.
It has been associated with love potions for centuries.
Romans used savory as a medicinal and culinary herb long before they discovered pepper.
In medicine they used it for bee stings, and as an aphrodisiac.
When the Romans brought savory to England, it was used there as an herb for chicken stuffing instead of a medicinal herb.
I have an English friend who says she grew this herb back in England and used it often in her cooking, especially with chicken.
As previously mentioned there are two distinct varieties of savory - summer and winter.
Summer Savory
Summer Savory

Summer savory is most often used for healing.
Summer savory is said to increase sex drive, while winter savory decreases it.
Make sure you get your savories right.
The active ingredients of savory are carvacrol, p-cymene and tannins. It’s an astringent and mild antiseptic. A tea made from summer savory is said to control a mild sore throat.
Rubbing a sprig of savory on an insect bite will bring instant relief.
What does Summer or Winter Savory like?
Well, it’s no different than growing Thyme, it likes full sun with well-draining soil.
Savory prefers to be planted in soil that's slightly alkaline.
Give it a side-dressing of compost or worm castings whenever possible. Summer savory is bushy and low-growing so it makes an excellent edging plant for a kitchen garden, herb bed, or vegetable garden.
Summer savory likes regular water. I have some growing in a strawberry pot so that it cascades out of one of the holes. It seems to like that spot better than the strawberries. As far as the soil in my container goes, well it’s just potting mix with soil wetter crystals added to it. So you see it's well-suited to container gardening, as well.
Summer Savory can be grown from seed sown in spring, but that’s if you can get the seed. Some say these tiny plants resent being transplanted, but I’ve taken pieces from my stock plant and transplanted it into other containers no problems at all/
If you know of someone with this plant, now’s the time to take soft-stem cuttings of about 2-3 cm long and put them in some seed raising or propagating mix. You probably don’t even need to cover it, because, just like the herb Thyme, it strikes very easily.
Savory flowers in mid-January with white or pale pink 5mm flowers grouped in terminal spikes.
You can begin to take the leaves from your savory plant as soon as it reaches 13cm or about 6 inches in height.
Savory Herb

Keeping the plant pruned means you’ll always have some.
My plant dies down a bit in winter, but always regrows, so that’s a good reason to get some summer savory for your herb garden.
Tips For The Chef
Summer savory, Satureja hortensis, is a nice herb to use when you are cutting back on salt-it's flavour is mild, a little bit similar to thyme, but with it's own unique flavour.
To me, it has a slightly peppery flavour, but a piney fragrance when you crush it in your hand.
You can mince summer savory and combine with bread crumbs for coating fish or vegetables such as squash before sauteing. Use it in potato dishes, tomato sauces, meatballs or vegetable juices. It's also great in egg dishes such as omelets and frittatas.
Savory is popular in teas, herbed butters, and flavoored vinegars. It complements beef soup and stews, chicken soup, eggs, green beans, peas, rutabagas, asparagus, onions, cabbage, and lentils.
Use savory when cooking liver, fish and game.
Mince fresh summer savory leaves and combine with garlic, bay and lemon for a good marinade for fish.
Savory blends well with other herbs such as basil, bay leaf, marjoram, thyme and rosemary.
Chefs and cooks say that the taste of savory brings all these herbs together in a unique taste that makes savory an Amalgamating herb.
Why is it good for you?
Savory herb is an excellent source of minerals and vitamins -.
Its leaves and tender shoots are one of the richest sources of potasium, iron, calcium, magnesium, manganese, zinc and selenium.
This herb also has dietary fibre. Who would believe?
Potassium is an important component of cell and body fluids that helps controlling heart rate and blood pressure.
AND THAT WAS YOUR VEGETABLE HERO FOR TODAY

DESIGN ELEMENTS

Living Fences and Garden Loopers
This garden series with Garden Designer Peter Nixon, is all about garden challenges thrown at us mostly by nature but also due to a situation in your garden that you might need to fix.Today’s garden challenge is twofold.
Living Fence with Murraya paniculata
 Firstly white cabbage moths can lead to big troubles not just in your veggie patch and secondly; you may have inherited a few things that you don’t necessarily like, in particular that front boundary fence. 
You can change that without it costing too much. 
What about a front living fence:Let’s find out. I'm talking with Peter Nixon, garden designer. 
Living fence-Muehlenbeckia and Plumbago. photo M Cannon
For a living fence some of the plant suggestions were Solanum longiflora, Plumbago and Muehlenbeckia, Hibbertia scandens, 

PLANT OF THE WEEK

Brugmansia sp. Angel Trumpets.
Want to grow a showstopper that stops people in their tracks and even gets them out of their cars taking photos?Well this tree is one of those, because when it’s in full flower, it’s spectacular. Plus in the evening there’s a sweetly scented perfume that wafts through your bedroom window.Let’s find out more.
Angel Trumpet. Brugmansia versicolour photo M Cannon

I'm talking with the plant panel:-Karen Smith editor of Hort Journal, www.hortjournal.com.au  and Jeremy Critchley, the owner of the Green Gallery Nursery www.thegreengallery.com.au


Most Brugmansia are fragrant in the evenings which is an adaptation to attract pollinating moths in the country of origin being the tropical regions of South America.
Brugmansia are mostly woody trees or shrubs growing to 3-5 metres, with pendulous, trumpet like, flowers.
They come in shades of white, yellow, pink, orange, green, or red.
Flowers may be single, double, or more.
Brugmansia are easily grown in a moist, fertile, well-drained soil, in sun to part shade, in frost-free climates. 
Morning sun is an ideal position for your Angel Trumpet. 
Fertilise with an organic fertiliser during the warm months.
Until recently only a few pale coloured common varieties were available in Australia.
Now plant breeders have dreamed up a whole new range. 
Here’s some to get you started; Aztec Gold with strong lemon yellow flowers and Hot Pink with deep lolly or hot pink flowers and My Clementine with deep golden yellow frilly double flowers. Mmmm, must get that one.
For lovers of gardening books, Alistair Hay's book "Huanduj" has all the new cultivars.


Sunday, 27 July 2014

Get Loopers, Grow Veggie Scraps, Smell Boronias

REAL WORLD GARDENER Wed. 5pm 2RRR 88.5fm Sydney, streaming live at www.2rrr.org.au and Across Australia on the Community Radio Network. www.realworldgardener.com
REALWORLD GARDENER NOW ON FACEBOOK
The complete CRN edition of RWG is available on http://www.cpod.org.au/ , just click on 2RRR to find this week’s edition. The new theme is sung by Harry Hughes from his album Songs of the Garden. You can hear samples of the album from the website www.songsofthegarden.com

PLANT DOCTOR

with Steve Falcioni from www.ecoorganicgarden.com.au


The caterpillar stage of various moths, and butterflies eat the leaves and flowers of your plants non-stop and can destroy your crops almost overnight.eaten by this pest.

Somehow they’ve eluded being caught because they blend in so well with the colour of the leaves.

Loopers are very tenuous-the Basil leaves on the left were washed and dunked in water, yet these loopers managed to stick on.
The only alternative was to go over every single leaf to see how many there where!

The not so friendly garden looper.
Let’s find out what you can do about them.
Keep the garden free of weeds, check susceptible plants for garden looper eggs and crush them before they hatch.
They’re quite small so look very carefully.
Check the undersides of leaves for young looper larvae.
Hand pick and destroy them by dropping the caterpillars in soapy water.
You can net your veggie bed with fine netting to stop the moths laying their eggs.
For a rather yukky remedy you can try Cabbage looper soup spray.Larvae are susceptible to a virus that kills them.
And infected caterpillars will look yellow or white, and swollen.
Blend these sick caterpillars with water and spray it on plants to infect other larvae.
Best thing to apply is Dipel which contains Bacillus thuringensis when larvae are young.
If you have any questions about garden loopers why don’t you drop us a line to realworldgardener@gmail.com or write in to 2RRR P.O. Box 644 Gladesville NSW 1675.

VEGETABLE HEROES

Growing veggies from scraps!
Who knew that you can re-grow celery, spring onions and a whole bunch of veggies from their scraps?
That’s right leeks, lemongrass, bok choy, cabbage, potatoes, garlic and ginger, -all these plus more.
There’s there are heaps of different foods that will re- grow from the scrap pieces that you’d normally throw out or put into your compost bin.
 Here’s howLet’s start with Celery, yes celery, it’s quite simple: just stand the base of the celery bunch in a small dish of water for a week or so until new leaves appear in the centre.
The leaves will be yellow at first, and once they really emerge and turn green, you can plant the celery in the ground or in a pot.
How about re-growing Leeks, Shallots Spring Onions and Fennel?You can either use the white root end of a vegetable that you’ve already cut, or buy a handful of new vegetables to use specifically for growing.
Simply place the white root end in a glass jar with a little water, and leave it in a sunny position. I keep mine in the kitchen window.
The green leafy part of the plant will continue to shoot. When it’s time to cook, just snip off what you need from the green growth and leave the white root end in water to keep growing.
Freshen up the water each week or you’ll have a regular supply of leeks shallots and spring onions.
As for Lemongrass
Lemongrass grows just like any other grass.
Same thing to re-grow it, place the root end (after you’ve cut the rest off) in a glass jar with a little water, and leave it in a sunny position.
Within a week or so, new growth will start to appear.
Transplant your lemongrass into a pot and leave it in a sunny outdoor position. You can harvest your lemongrass when the stalks reach around a foot tall – just cut off what you need and leave the plant to keep growing.

What about Bok Choi, Romaine Lettuce & Cabbage?


Just like leeks, these vegetables will re-grow from the white root end.
Cut the stalks off as you normally would, and place the root end in a shallow bowl of water – enough to cover the roots but not the top of your cutting.
Put your leek celery or bok choy in a sunny spot, spraying occasionally with water to keep the top moist.
After a few days, you should start to see roots and new leaves appear.
After a couple of weeks or so, transplant it into soil with just the leaves showing above the level of the soil.
The plant will continue to grow, and within a few weeks it will sprout a whole new head.

TIP:If you don’t like the idea of have jars cluttering up your windowsill with bits of veggies stuck in them you can plant your cutting directly into soil (without starting the process in water)
But you will need to keep the soil very moist for the first week until the new shoots start to appear.

GINGER
If you like Asian cooking you’ll like to grow your own Ginger.
Ginger is very easy to re-grow. Simply plant a spare piece of ginger rhizome (the thick knobbly bit you cook with) in potting soil with the newest (ie. smallest) buds facing upward.
Ginger prefers filtered, not direct, sun in a warm moist environment.
Before long it will start to grow new shoots and roots.
Once the plant is established and you’re ready to harvest, pull up the whole plant, roots and all.
Remove a piece of the rhizome, and re-plant it to repeat the process.
Of course if you’re not in the right climatic zone, you will have to grow this one indoors for a bit before putting it outside.
For those gardeners in cool temperate areas, Ginger makes a very attractive indoor-plant, so if you don’t use a lot of ginger in your cooking you can still enjoy the lovely plant in between harvests.
POTATOES


We all probably know about re-growing potatoes.
Re-growing potatoes is a great way to avoid waste, as you can re-grow potatoes from any old potato that has ‘eyes’ growing on it.
Pick a potato that has robust eyes, and cut it into pieces around 5cm square, making sure that each piece has at least one or two eyes.
Leave the cut pieces to sit at room temperature for a day or two, which allows the cut areas to dry and callous over.
This prevents the potato piece from rotting after you plant it, so that the new shoots get the maximum nutrition from each potato piece.
Potato plants need a high-nutrient environment, so make sure you’ve added compost to your soil before you plant them.
Plant your potato pieces around 20cm deep with the eye facing upward, and cover it with around 10cm of soil, leaving the other 10cm empty.
As your potato grows and more roots appear, add more compost/potting mix or soil, depending on whether you’re growing your potatoes in a grow bag, in the ground or in a compost bin.
If your plant really takes off, mound more soil around the base of the plant to help support its growth.
Garlic is another easy one that I’m sure a lot of gardeners have tried already.
Garlic quite often sprouts in the fridge even so of course you can re-grow a plant from just a single clove.
Just plant it, root-end down, in a warm position with plenty of direct sunlight. The garlic will root itself and produce new shoots.
Once established, cut back the shoots and the plant will put all its energy into producing a tasty big garlic bulb.
And like ginger, you can repeat the process with your new bulb.

ONIONS are one of the easiest vegetables to grow from scraps too.
Just cut off the root end of your onion, leaving about 1-2 cms of onion on the roots. This needs to go into a sunny spot in the garden  then cover the top with soil. Keep the soil moist.
Onions prefer a warm sunny environment, so if you live in a colder climate, keep them in pots and move them indoors during frostier months.
As you use your home-grown onions, keep re-planting the root ends you cut off, and you’ll may never need to buy onions again.
TIP: One thing to note-if you try this with root veggies say a carrot, a plant that re-grows from planting a carrot top will NOT produce edible carrots, only a new carrot plant.
The vegetable itself is a taproot which can’t re-grow once it has been removed from the plant.
MUSHROOMS
Lastly, one for the mushroom officionado.

Mushrooms can re-grow from their stalks but they’re one of the more difficult vegies to re-grow. Mushrooms like darkness, warmth and humidity and nutrient-rich soil.
This time you need a mix of soil and compost in a pot (not in the ground) so your re-growth is portable and you can control the temperature of your mushroom.
Gardeners have reported the most success with a warm filtered light during the day and a cool temperature at night.
Just remove the head of the mushroom and plant the stalk in the soil, leaving just the top exposed.
In the right conditions, the base will grow a whole new head. Apparently  you’ll know fairly quickly if your mushroom has taken to the soil as it’ll either start to grow or start to rot in the first few days.
AND THAT WAS OUR VEGETABLE HERO SEGMENT FOR TODAY!

DESIGN ELEMENTS

with landscape designer Jason Cornish

Have you got a pool that you don’t use any more?
The kids have grown up and it’s just sitting there looking a bit green.


You might need more space that the unwanted pool is taking up.


Pools cost quite a bit to put it in so what happens when they become just one big drain on the pocket?


Filling them in is an option, but that’ll be quite expensive too.
So what else can you do with that pool, even with a budget in mind?


Let’s find out what this is all about.


Something to think about if you don’t want that pool anymore. Besides the unused pool is probably acting like a pond anyway, but you can make it into a more environmentally friendly ecosystem what will attract dragonflies and even small birds if you plant sedges along the edges.
Apart from the environmental benefits, you'll be using less chemicals-good for your hip pocket and the planet.
Less power usage if you don't want or need a pump in the pond.
You can still swim in the pool if you like and the conversion is reversible.
Pool conversions are more practical than just filling in the hole and you have something aesthetic too.


PLANT OF THE WEEK

Muogaumurra nature reserve


Boronias are small shrubs that grow all over Australia.
Those Boronias that grow naturally on the eastern states are much more longer longer than there exotic cousins from Western Australia.
But regardless of where they come from, Boronias put on a perfumed show that’s hard to resist.
Most highly perfumed and most prized Boronias are from WA and most of the plants you come across at regular retail nurseries are propagated from cuttings.

WHY ARE PLANTS FRAGRANT ?

The fragrance of flowers is thought to be mostly to attract insects, birds and animals to pollinate the flowers. This may attract a range of pollinators or only one e.g. Red clover which is only pollinated by bees. Boronias - Boronia megastigma varieties (The brown Boronia), and B. serrulata have very fragrant flowers. B. 'Sunset Serenade' and B. denticulata have aromatic foliage. Tips for growing Boronia
     Most important-excellent drainage, so sandy soil or raised beds.
  Don’t let the plant dry out but don’t overwater it, especially in humid weather because this plant and many other Australian plants are prone to getting root rot fungus that loves moist warm soil.
Protect the roots from soil temperature variations-either by planting in an easterly or north easterly aspect or under an open canopy tree, like a gum tree, and protect from winds. Mulching is paramount, and the stones theory might work too.
  Prune-yes Australian plants need pruning in the home garden. Don’t be afraid.  For Boronias prune when they are growing strongly, especially the flowers. Put them in a vase.
Fertilise Boronias in Autumn, not Spring, otherwise you won’t get many flowers and just green growth. Use organic fertilisers or some controlled release ferts-the ones with coated small balls.
Lastly, as soon as you buy your plant, think about taking cuttings-from February to April-take firm new growth, that happened after flowering.
They should strike in 6 weeks if you put them in a mini-greenhouse.

Some cultivars
·        'Harlequin' - red and yellow striped flowers
·        'Heaven Scent'- compact cultivar with brown flowers
·        'Jack Macguire's Red' - red flowering form
·        'Lutea' - yellow flowering form
·        'Royale' - dwarf form
·        Other hybrid boronias are grown simply for their attractive flowers, rather than their perfume, including ‘Purple Jared’ (brilliant purple flowers), ‘Aussie Rose’ (rose pink flowers) and ‘Lipstick’ (lollypop pink flowers).

·        Climate: Boronias are at their best in the cooler areas of southern Western Australia, the Dandenongs and Mornington Peninsula in Victoria, Tasmania and the Blue Mountains of New South Wales.

Try growing from seed. Try grafting if you’re an advanced gardener. Use Correa as root stock.

Specialist native nurseries graft Boronia megastigma on to root stock of eastern Boronia species, that tend to produce much stronger root systems when grown from cuttings.